
As the days get shorter and the water cools, it’s time to face a critical task for any boat owner: winterizing your outboard motor. Ignoring this essential maintenance can lead to costly repairs and a frustrating start to next season. Proper preparation protects your investment from corrosion, fuel degradation, and freezing temperatures.
Here is your step-by-step guide to putting your outboard to bed the right way, ensuring it wakes up ready to run next spring.
Step 1: Fuel System Preparation – Stabilization is Key
The fuel sitting in your tank and motor over the winter is one of the biggest potential hazards. Modern ethanol-blended fuels can absorb moisture and degrade quickly, leaving behind gummy deposits that clog carburetors and fuel injectors.
- Add Fuel Stabilizer: Fill your boat's fuel tank to at least 7/8 capacity to minimize the air space where condensation can form. Add a high-quality marine fuel stabilizer according to the manufacturer's instructions.
- Run the Engine: Run the engine on the water or with a flush muff and hose for at least 10–15 minutes. This ensures the stabilized fuel has circulated through the entire fuel system, including the fuel lines, filter, pump, and carburetor (or injectors).
Step 2: Engine Protection – The Art of Fogging
Fogging is the process of applying a protective oil to the motor's cylinders, valves, and piston rings. This prevents rust and corrosion from forming on these critical internal parts during the months of inactivity.
- Remove Spark Plugs: Carefully remove the spark plugs.
- Spray Fogging Oil: Spray the fogging oil directly into each spark plug hole.
- Turn the Engine Over: Gently rotate the flywheel by hand (or crank the engine quickly for a second or two with the kill switch disconnected) to distribute the oil across the cylinder walls.
- Replace Spark Plugs: Inspect your spark plugs. If they are old, this is a perfect time to install new ones. Reinstall the plugs and torque them to the manufacturer's specification.
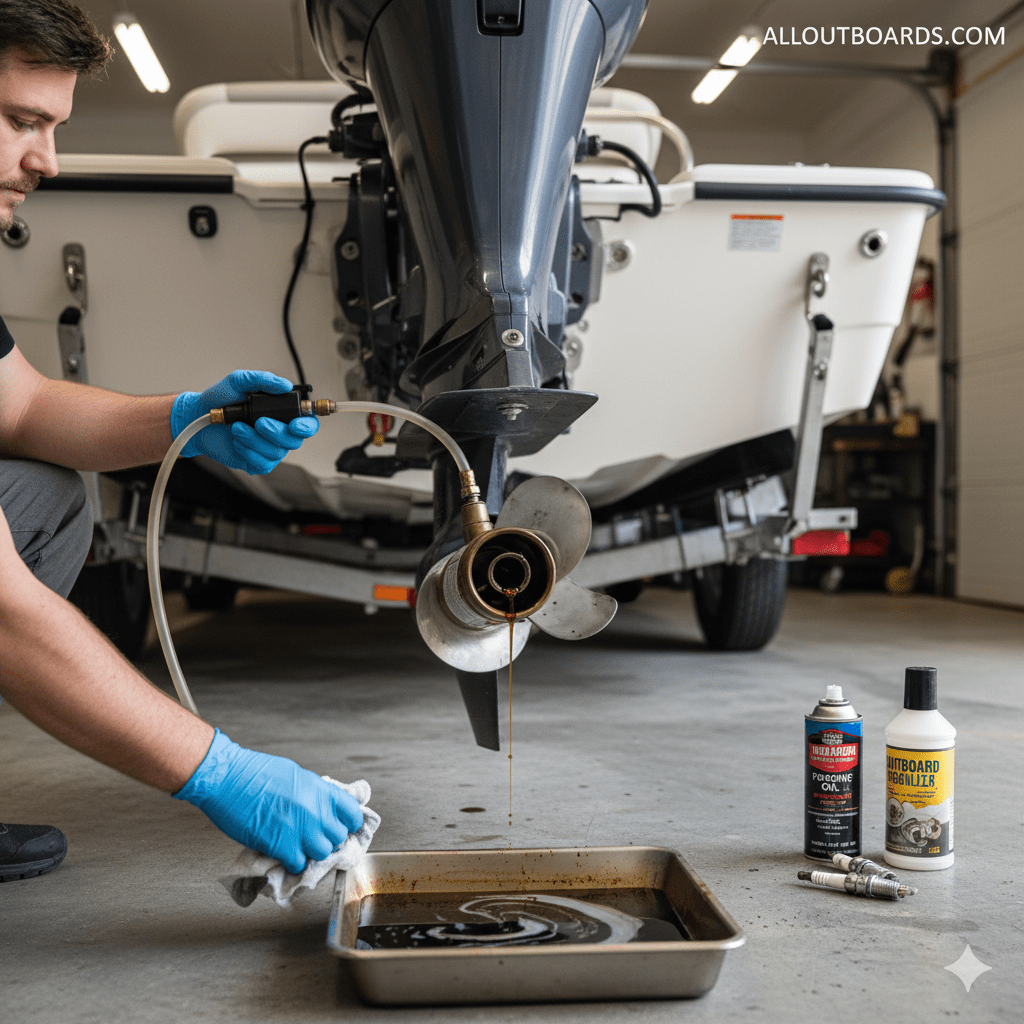
Step 3: Lower Unit Maintenance – The Gear Oil Change
The lower unit, which houses the gears that turn the propeller, is prone to water intrusion. If water gets in and freezes, it can crack the gear case—an expensive repair.
- Drain the Old Oil: With the motor vertical, place a drain pan underneath and remove the lower and upper drain screws on the side of the gearcase.
- Inspect the Oil: Look closely at the drained oil. If it's milky, frothy, or appears white, you likely have water intrusion. This indicates a potential seal problem that needs to be addressed by a mechanic before next season. If it looks dark and clean, you're fine.
- Refill with New Oil: Using a gear oil pump, inject fresh, high-quality marine lower unit gear lube into the lower drain hole until the oil starts to seep out of the upper vent hole.
- Seal It Up: Install the top screw, remove the pump from the bottom hole, and quickly install the bottom screw.
Step 4: Lubrication and Corrosion Control
- Grease Moving Parts: Apply marine-grade grease to all grease points, including the tilt tube, swivel bracket, and steering linkage.
- Clean and Protect: Wash the outside of the motor to remove salt and grime. Apply a moisture-displacing spray (like WD-40 or a specialized corrosion inhibitor) to all non-painted, exposed metal surfaces like the powerhead linkages and electrical connections. Be sure to check your owner's manual to ensure you don't spray sensitive components.
Step 5: Final Storage Tips
- Check the Cooling System: Now is a good time to check the condition of your water pump impeller. If you haven't replaced it in 2–3 years, consider a replacement to avoid overheating next season.
- Propeller Inspection: Remove the propeller. Inspect the prop for damage and check the prop shaft for fishing line that may have wrapped around it. Apply a light coat of grease to the propeller shaft before reinstalling the prop.
- The Final Resting Position: Store the motor vertically in a dry, covered area. A vertical position helps ensure any remaining water in the cooling passages drains completely, preventing freeze damage. If the motor must remain on the boat, make sure it is tilted down.
Taking the time to follow this winterization checklist now will save you time, money, and headaches come spring. Treat your outboard right, and it will be ready to power your next season's adventures!
Explore more maintenance tips right here at alloutboards.com!
Subscribe to our newsletter and receive a selection of cool articles every weeks.
.png)
.png)
.png)
.png)

